Outlook Backup Toolbox
Outlook Backup Toolbox can backup and restore MS Outlook data and settings with passwords entirely in just a few clicks.
How to backup Microsoft Outlook data and settings
This is a step-by-step guide to backing up data and settings, including passwords, for the Microsoft Outlook mail client. This program allows even novice users to save all of their messages, contacts, tasks, mail settings, passwords, and other information to one file.
- Download, install and run Outlook Backup Toolbox from here: https://all-recovery-inc.com/download/OutlookBackupToolboxInstall.exe
- Select the location on the disk and the name of the backup file.
- Select the backup options:
- Start time;
- Archiving mode;
- Splitting the file into volumes;
- Encryption method and password.
- Click Start backup.
How to restore Microsoft Outlook data and settings from a backup
This is a guide for restoring Microsoft Outlook settings and data from a previously made backup. This tool allows you in just a couple of clicks to restore messages, contacts, tasks, mail settings, passwords and other information from a file with a previously made backup.
- Download, install and run Outlook Backup Toolbox from here: https://all-recovery-inc.com/download/OutlookBackupToolboxInstall.exe
- Select the file that you previously backed up to.
- Select the data to be restored.
- Choose where to restore each Profile.
- Click Start Restore.
Outlook Backup Toolbox is an all-in-one tool for backing up your Microsoft Outlook data and restoring them when necessary. Please note that the software is not limited to backing up your emails only - it enables you to make a COMPLETE SNAPSHOT of your Outlook data, including emails, contacts, notes, tasks, calendar entries, email accounts and even passwords (unlike the majority of competitors)! This makes Outlook Backup Toolbox a great choice for transferring configured Outlook setups to other computers. Got a new laptop and wondering how to transfer your desktop-based Outlook to it? Installed a new computer at work and need to get rid of the old one before the end of the day, but need to have all the data transferred by this time as well? You already have the answer - Outlook Backup Toolbox is just what the doctor ordered for such cases!
Being an integral part of Microsoft Office, Microsoft Outlook is undoubtedly one of the most popular email applications on the planet. However, the functionality of this program goes far beyond exchanging emails. Microsoft Outlook can be used for managing tasks, scheduling meetings and appointments, keeping notes, storing contacts - in other words, it provides everything you need to manage your time and efficiently collaborate with your friends, partners and colleagues. Active Outlook users often accumulate thousands and tens of thousands of emails and contacts over years, and the loss of this information can have devastating and far-going effects. Although there is no way accidents can be prevented, simple measures of precaution and regular backups can save time, money and millions of your nerve cells in case of a major system crash or hardware failure.
Features of Outlook Backup Toolbox:
- Backup and restore Microsoft Outlook Personal Store Folders (*.pst files)
- Backup and restore Microsoft Outlook accounts
- Backup Microsoft Outlook email account with password
- Restore Microsoft Outlook email account with password
- Backup and restore Microsoft Outlook messages rules
- Backup and restore Microsoft Outlook settings
A simple and efficient application for creating complete Outlook backups and restoring data
Outlook Backup Toolbox backup and restore data and settings of:
- Microsoft Outlook 97
- Microsoft Outlook 98
- Microsoft Outlook 2000
- Microsoft Outlook XP
- Microsoft Outlook 2003
- Microsoft Outlook 2007
- Microsoft Outlook 2010
- Microsoft Outlook 2013
- Microsoft Outlook 2016
- Microsoft Outlook 2019
- Microsoft Outlook 2021
- Microsoft Outlook 2024
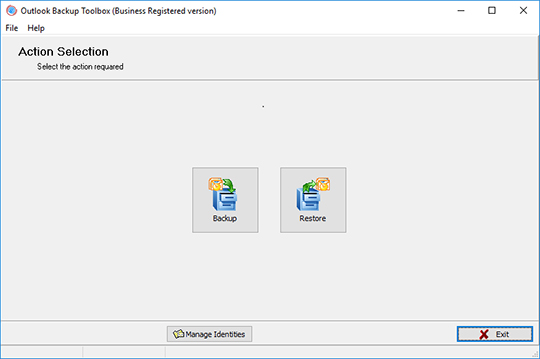
The interface of the Microsoft Office Outlook backup tool is as simple and unambiguous as possible. The startup screen contains only three buttons - Backup, Restore and Manage Profiles. Clicking the Backup button will start the backup wizard. The first screen of the wizard contains a tree of Outlook profiles and data types/accounts within them. Once you have marked the ones you want to back up, proceed to the next step. Here you will choose the location of the output backup file. The final step enables you to select some backup options, such as the backup archive compression level (the lower the compression level, the faster your data will be backed up and vice versa), volume splitting (for storing on various media) and password protection using one of the available strong encryption algorithms. Backups can be performed either on the ad hoc basis or regularly. In this case, you can add a recurring task to the standard Windows scheduler and the process will be started automatically at the time you specify - for instance, during your lunch break or at night. This is the final step of the backup wizard. Once you press the Start Backup button and confirm your intention to proceed, the program will start backing up your data. How to backup Microsoft Office Outlook emails and clients?
How to backup Outlook 2003 accounts and restore in Outlook 2007? The data restoration process is just as simple. Two data restoration modes are available: Simple and Advanced. The Simple mode is the quickest way to restore all of your backup data in one click, while the Advanced mode gives you more flexibility in defining the data types to be restored and selecting the destination profile for your data.
As you see, Outlook Backup Toolbox is extremely easy to use. Make sure that Microsoft Outlook is closed prior to proceeding to any backup/restore operations to avoid error messages. The duration of the backup/restore process depends mainly on the amount of data you have accumulated in your folders and the speed of your computer.
We suggest downloading a 30-day evaluation version of Outlook Backup Toolbox to get familiar with the program. Outlook Backup Toolbox is a 1-2-3 solution for reliable and fast Outlook backups and painless transfers of your Outlook data from one computer to another.
Requirements:
- Windows 98/Me/2000/XP/Vista/7/8/10/11 or Windows Server 2003/2008/2012/2016 and above
Screenshots:
Backup: Select the backup mode
Backup: Select the information you want to back up
Backup: Select the file the backup copy will be saved to
Backup: Configure the backup parameters
How it Works:
Download software from website. Download
Start Install software:
- Press on downloaded installation file in browser

- Select a downloaded installation file in Windows Explorer and press Enter or double click on it.
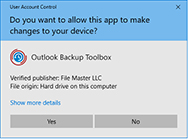
Please confirm warning message:
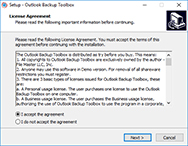
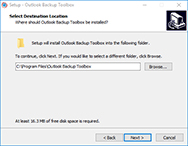
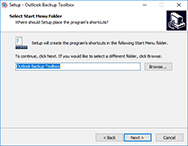
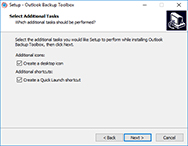
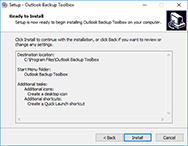
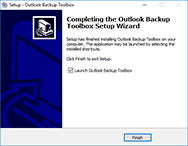
Run installation wizard:
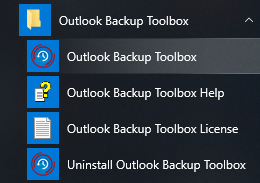
Run program:
- Double click on icon on desktop
or
- Select from main menu: Start | Programs | Outlook Backup Toolbox | Outlook Backup Toolbox:
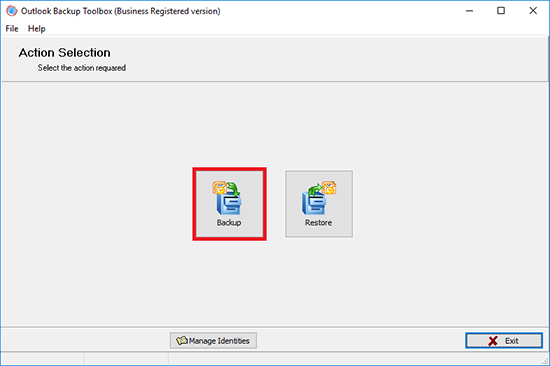
Select the desired action:
- Click on the Backup button if you want to make a backup copy
- Click on the Restore button if you want to restore the data from a backup
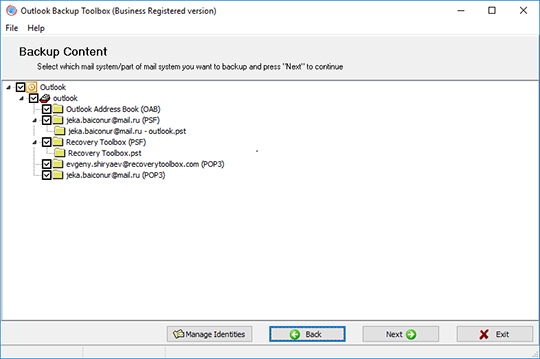
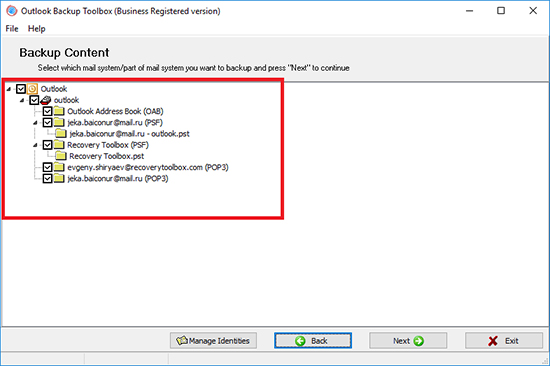
If you are backing up, the second page of the program requires you to select the Microsoft Outlook profile as well as the data files and account settings that will be saved:
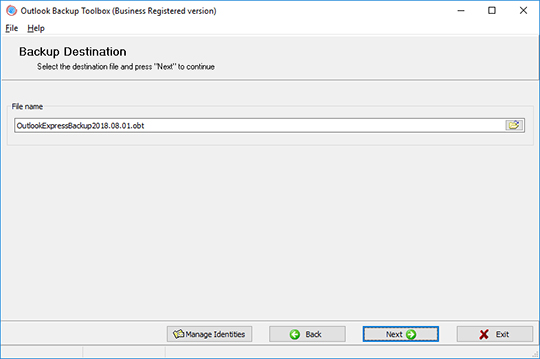
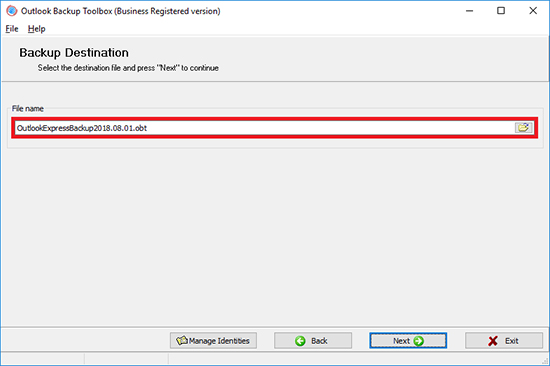
Select the location on the disk and the name of the backup file:
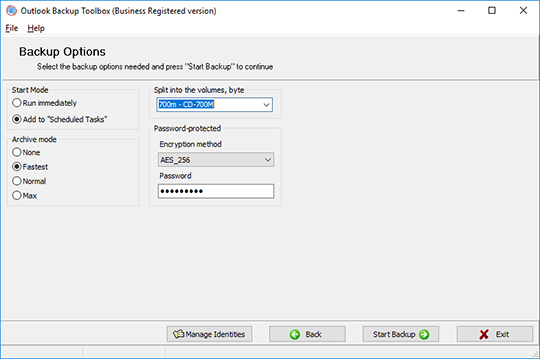
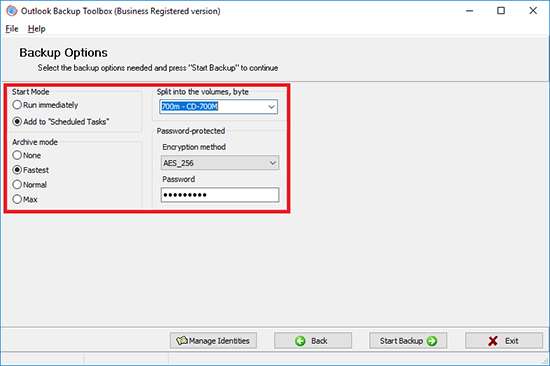
Select the backup options:
- Start time;
- Archiving mode;
- Splitting the file into volumes;
- Encryption method and password.
Click Start backup:
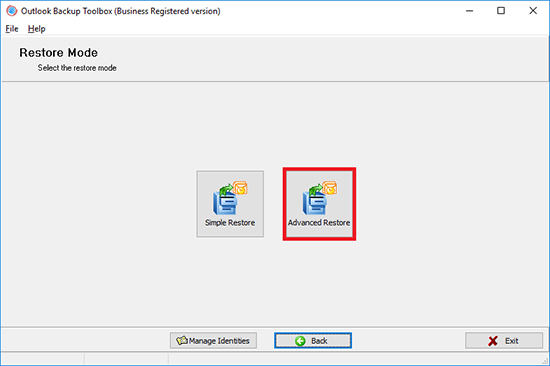
If you are restoring from a backup, you must select the recovery mode on the second page of the program:
- Simple Restore provides simple as is data recovery
- Advanced Restore allows you to configure particular restoration options.
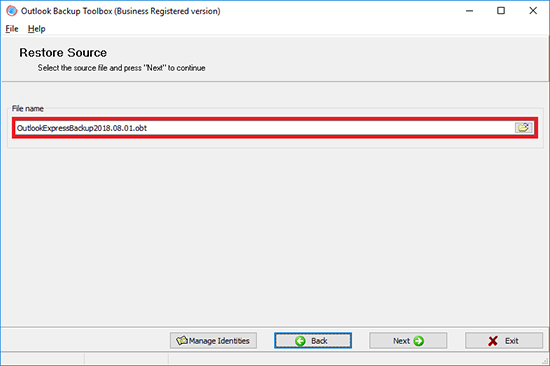
Select the file that you previously backed up to:
Select the data to be restored:
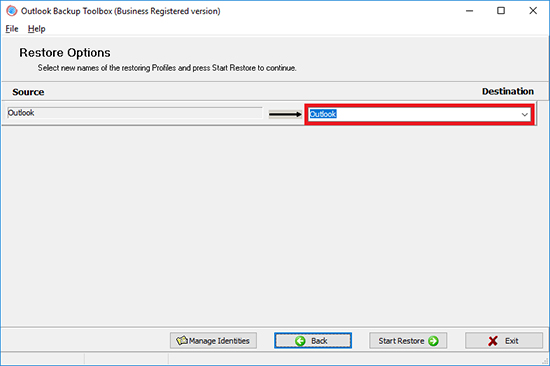
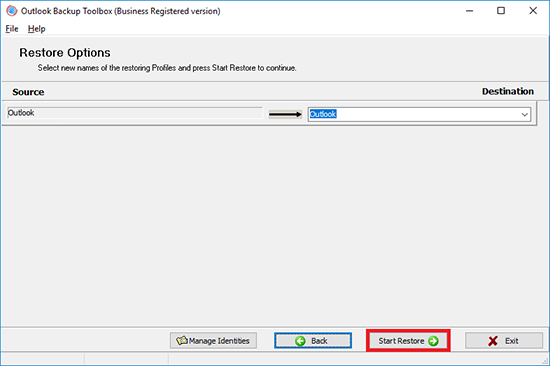
Choose where to restore each Profile:
Click Start Restore:
Video:
Online help:
Outlook Backup Toolbox (Download) was created with simplicity in mind, which makes it naturally easy to use. You won't need any special skills or knowledge to successfully back up your data and restore it at any time. Just follow the simple instructions below to be always sure that your valuable Microsoft Outlook data is reliably protected from any threats and that you can always roll the system back to its previous state no matter what happens.
The interface of Outlook Backup Toolbox is essentially a wizard that guides you through several simple steps and allows you to configure certain aspects of the backup and restoration processes. You can go forward to the next step or backward to change settings at any time, so don't hesitate to do so whenever you feel necessary.
Main Screen
The startup screen of Outlook Backup Toolbox contains only three functional buttons: Backup, Restore and Manage Profiles. The names of these functions are fairly self-explanatory, but we will describe the features behind each of them in great detail.
The step-by-step manual for Outlook Backup Toolbox
Backup:
- Select the information you want to back up
- Select the file the backup copy will be saved to
- Configure the backup parameters
- Finish the process
Restore:
Backup

1. Select the information you want to back up
Pressing the Backup button will bring up the first screen of the backup wizard. This screen contains a tree-like structure of your Outlook profiles with data files (*.pst) and account settings (POP3, IMAP, HTTP, etc). The program enables you to back up and restore data and account settings independently, which comes in handy for partial backups. You can check and uncheck the items you want to include in the backup file. If you want to include all of the available Outlook data and settings, leave all the boxes checked and press Next to proceed to the next step.
2. Select the file the backup copy will be saved to
That's where you define the name and location of the output backup file. To do that, either type the path and file name in the input field or use the standard Save File system dialog. Once done, press Next to proceed to the next step.


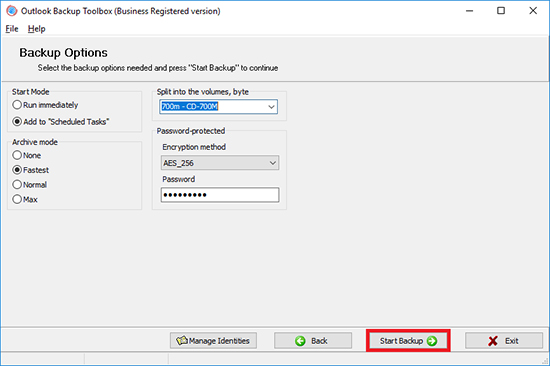
3. Configure the backup parameters
This step allows you to set additional options for saving:
- Start mode: Run Immediately | Add to Scheduled Tasks
- This option defines whether the backup procedure will be run once or added to the list of scheduled system tasks. If the latter option is selected, pressing the Next button will bring up the standard New Task dialog. Most of its fields will be already pre-filled, so all you will have to do is set the recurrence pattern for the new task - daily, weekly, monthly, at Windows startup, when a user logs in - and specify the day of the week and time the task will be launched at. The final part of the task creation process requires you to enter the username and password for the user on whose behalf the task will be started. Once this stage is complete, the task will appear in the standard Windows Scheduled Tasks window (Start | All Programs | Accessories | System Tools | Scheduled Tasks) and you will always be able to modify it in the future.
- Archive mode: None, Fastest, Normal, Max]
- This option enables you to set the backup file compression level. The lower it is, the faster your computer will back up your Outlook data and save it to the output file. Low compression is recommended for extra-large backups performed on relatively slow PC's or in time-critical situations. In all other cases, higher compression levels will result in a reduced size of the resulting backup file and will save your disk space.
- Split into volumes, bytes
- This handy option enables you to select the size of the volumes your output file will be split into. This parameter depends on the type of medium that the backup file will be stored on. The dropdown field of this option contains several predefined values - from 1.44 MB floppy disks to 700 MB CD's. If necessary, you can type the exact volume size in bytes.
- Password-protected
- Outlook Backup Toolbox allows you to password-protect your backup files and select the encryption algorithm to be used: PkZip classic, AES128 or AES256. If password protection is not necessary, just leave the option set to No Encryption.
This is the final step of the backup preparation process. If you selected the Run Immediately option, the program will start backing up your Outlook Data once you press the Next button and confirm your intention to proceed. However, if you decided to make the Outlook backup process a regular procedure that should be added to the list of scheduled tasks, the Next button will open the New Task dialog described above. After you finish configuring the tasks parameters and press OK, the program will show a confirmation text if the task has been added successfully.
The duration of this process depends mainly on the amount of data stored in your Outlook data files, the speed of your computer and the output file compression level you set on the settings page. Once the backup process is finished, you can go back using the Back button to change settings or choose another output file.

Restore
Your Outlook data can be restored at any time and using any of your backup files. To do that, go to the main screen of the program by restarting Outlook Backup Toolbox or pressing Back until the main screen is reached. On the main screen, click the Restore button.
WARNING: Restoring your data can fully erase your current Outlook profiles and data (without questions asked and prompts shown), which will make their recovery virtually impossible. This may happen in the following cases:
- In the Simple Restore mode, if the name of the existing Outlook profile matches the name of any of the profiles being restored.
- In the Advanced Restore mode, if the name of the existing Outlook profile matches any of the names specified at Step 3, no matter how it was entered - typed by the user, selected from the dropdown list or suggested by the program.
PLEASE BE EXTREMELY ATTENTIVE WHEN RESTORING YOUR DATA AND DOUBLE-CHECK THE NAMES OF PROFILES YOU WORK WITH. THE CREATORS OF THE PROGRAM BEAR NO RESPONSIBILITY FOR THE LOSS OF DATA CAUSED BY YOUR NEGLIGENCE OR IGNORANCE OF THE USAGE INSTRUCTIONS.

Two data restoration modes are available in the program: Simple Restore and Advanced Restore. The Simple Restore mode is the simplest and the most straightforward way of restoring Outlook data. It is primarily intended for users who have a single Outlook profile that is occasionally backed up and restored (for more complex Outlook configurations, we always recommend using the Advanced Restore mode). Just select the backup file to be used by typing the path and file name into the File Name field or use the standard Save File dialog to choose the necessary backup file. After that, press Next and answer Yes in the confirmation dialog to start restoring your data.
ATTENTION: At the beginning of the restoration process, the software analyzes the data being restored and can prompt you once or twice depending on the structure of the backup file and your current Outlook configuration. If there are 2 or more profiles in your Outlook setup, Outlook Backup Toolbox will ask you to choose the destination profile your data will be restored into. The opposite is also true - if the backup file contains more than 1 profile, the software will prompt you to choose the one to be used for restoring data. Therefore, if both of these conditions are met, the program will show two prompts.
The Advanced Restore mode gives you more flexibility in defining the profiles, account settings and Outlook data files to be restored. The first stage of the process is identical to that in the Simple Restore mode - you select the backup file to be used for restoring your data. This can be done either by typing the full path and name of the necessary backup file in the File Name field or opening the standard Save File dialog by clicking a small icon to the right of the field. Once the backup file is selected, press Next.

2. Select the information you want to restore
The second screen of this wizard enables you to select the profiles, account settings and data files to be restored from the file. Just check or uncheck the necessary items and press. If you want to restore all of your Outlook data, leave every box checked and move on to the next screen by pressing the Next button.
3. Select the profile to restore the information to
The next and the final step of the data restoration process allows you to select the destination profile your data will be restored into. Two options are available here. If you want to restore a profile under a different name, type it in the field opposite the profile you are restoring. If you want to replace a currently existing profile by the profile being restored, you can select the profile to be replaced from the Destination dropdown list. Once these parameters have been configured, press Next. After you answer Yes to the confirmation prompt, the program will start restoring your data. Just like in the case of the backup process, the speed of data restoration depends primarily on the speed of your computer and the amount of data being unpacked.


Besides backing up and restoring Microsoft Outlook data, Outlook Backup Toolbox enables you to manage your Outlook profiles without leaving the program. Click Manage Profiles on any program screen and the profile management window will open. Here you can view the current structure of your Outlook profiles. The profile manager enables you to copy, rename and delete existing profiles, as well as to create new ones. This handy feature will save your time when performing multiple backups, creating profile duplicates and restoring data into additional Outlook profiles.
Buying Outlook Backup Toolbox:
Site License
for using on several computers of the customer (up to 100 electronic devices) in one building or distributed between several buildings
- An email with a registration code and instructions for activating this code will be sent to the user immediately after the payment confirmation.
- An email with a registration code will be sent from several different mail servers to prevent messages from appearing in SPAM filters. Accordingly, a possible duplication of registration letters received in the user's mailbox.
- To activate the registration code, you need to run the application in Windows under a user with Administrator rights.
- The number of Personal, Business or Site licenses activated simultaneously must not exceed the number of purchased licenses.
- We sell software via registration services PayPro Global and Noventiq. That is why not Recovery Toolbox, but the corresponding company will be specified in the payment documents.
The purchased registration key is valid for all 1.x versions of Outlook Backup Toolbox.
Buying the License Renewal
Business License - 1 Year prolongation
for legal use in enterprise, commercial and governmental environments
Payment Services:

PayPro Global (PayPro Global, Inc., 250 The East Mall street, Etobicoke, ON Canada, M9B 0A9) is the fastest growing eCommerce company that develops customized solutions to help software producers to easily and effectively sell software online. PayPro Global supports more than one hundred currencies, all major credit cards, and a wide variety of payment options. PayPro Global offers efficient customer support 24/7 and provides personal attention to customers having special requirements.

Noventiq online store for licensed software opened in 2004. Noventiq offers customers over 15,000 programs from 3,000 developers, provides fast delivery (electronic and physical), accepts 20 payment methods, and includes a cumulative discount system. Noventiq specialists provide customers with all the necessary advice for purchasing licensed software. Selling software is our profession!
Resources:
- Microsoft Outlook on Wikipedia: https://en.wikipedia.org/wiki/Microsoft_Outlook
- Official website of Outlook: https://products.office.com/en-us/outlook/
- Microsoft Office Outlook Team Blog: https://blogs.office.com/en-us/outlook/
- Community: https://techcommunity.microsoft.com/t5/Outlook/ct-p/Outlook